Simon XTi—Battery Replacement
This guide provides step-by-step instructions for safely replacing the backup battery in your Interlogix Simon XTi security panel. Proper battery replacement ensures your panel continues to function correctly during power outages. After installation, a new battery may take up to 24 hours to fully charge, and you will likely need to clear a "low battery" alert from the panel.
Battery Specifications & What You'll Need
Required Battery:
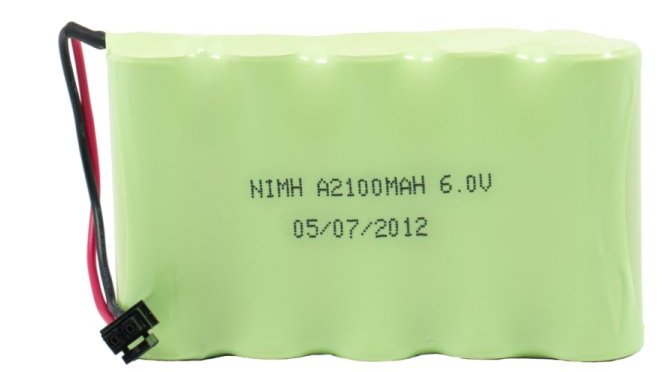
- Type: 6-Volt, 2100 mAh (2.1Ah) NiMH (Nickel-Metal Hydride) rechargeable battery pack. (Example Part Number for Simon XTi: 600-XTI-BAT or compatible).
This type of battery can be purchased at local hardware stores, electronics retailers, mass retailers, or specialized battery stores. You may also text a Support Representative at 469-513-8685 to inquire about ordering one.
Tools You Will Need:
- A coin or small, thin flat-head screwdriver (for prying open the bezel/cover on some Simon XTi models).
- A Phillips-head screwdriver (if your specific XTi model uses a securing screw).
- Your new 6-Volt 2100mAh replacement battery pack.
Step-by-Step Battery Replacement Instructions
- Locate the panel's AC power transformer (plugged into a wall outlet) and unplug it.
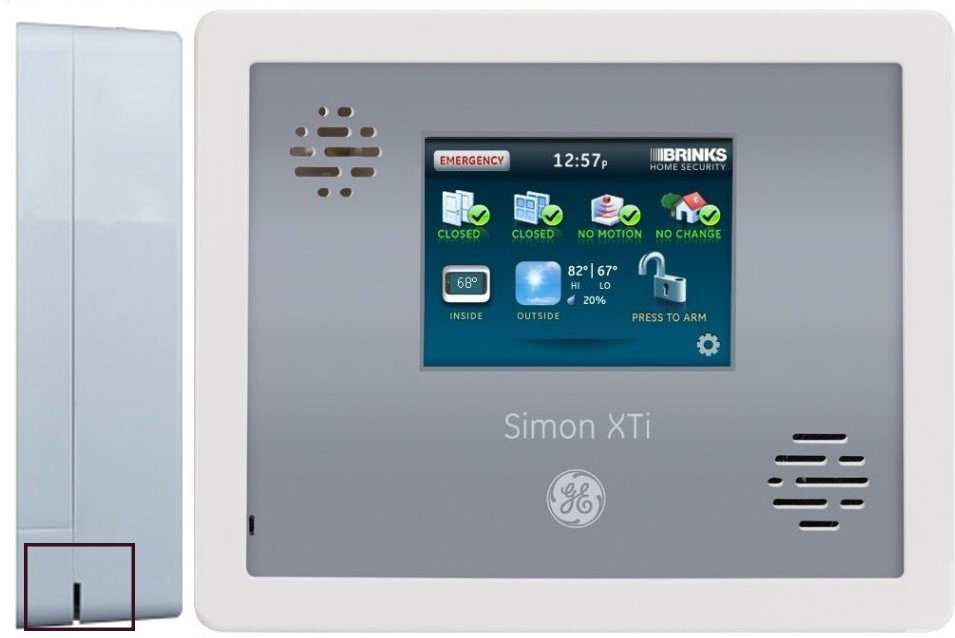
- Insert a coin or a thin, flat tool into the slot typically found in the bottom-right corner of the panel's outer bezel. Gently twist or pry to pop this bezel off the main panel unit.
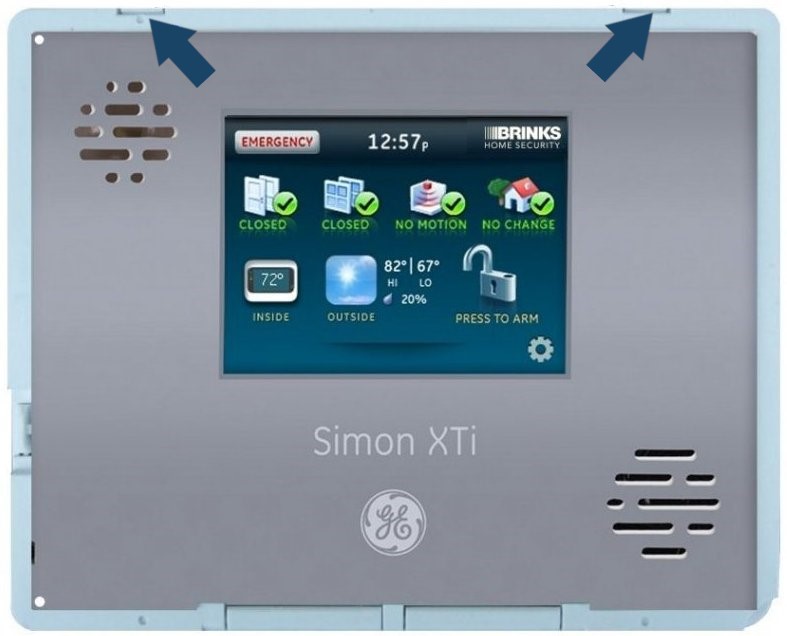
- Once any outer bezel/faceplate is removed, locate the two tabs on the top edge of the main panel body. Press these tabs upward while gently pulling the top of the front cover forward. The cover should then swing downward, as it is hinged at the bottom.
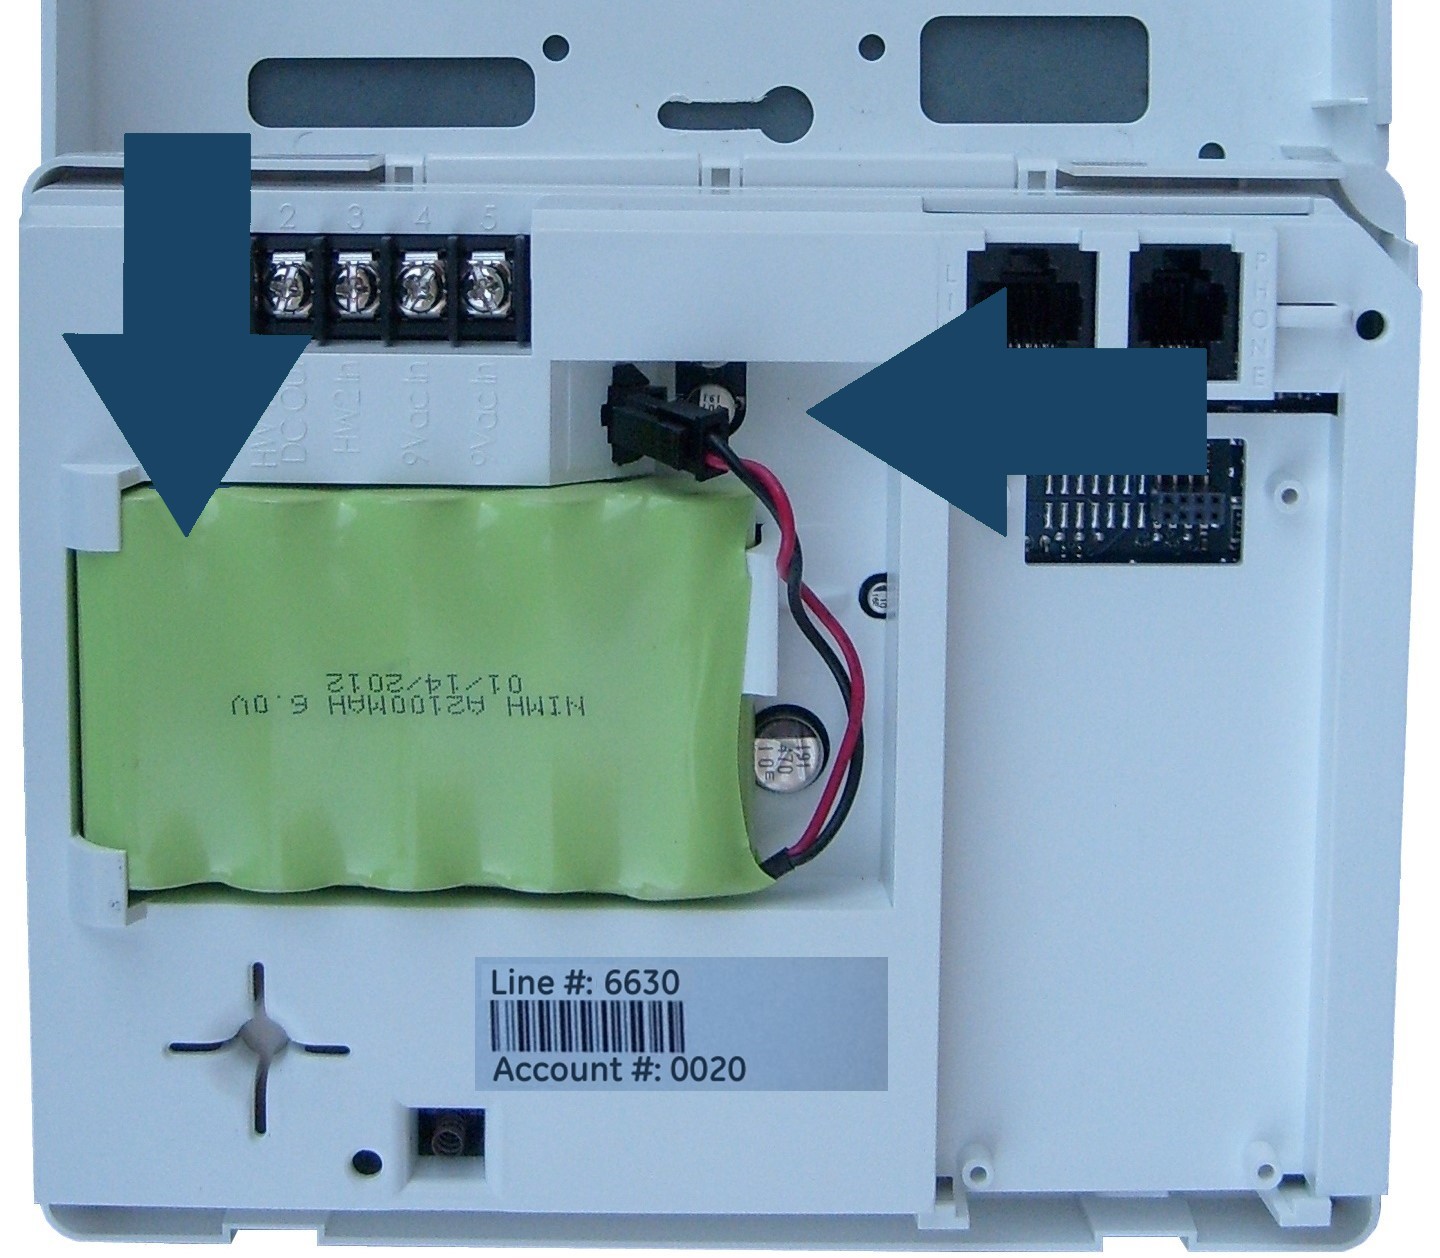
- With the front cover folded down, locate the backup battery pack inside the panel.
- Carefully unplug the battery pack's wire connector from the main circuit board. Grip the plastic connector to pull, not the wires.
- Gently remove the old battery pack from its compartment.
- Carefully place the new battery into the compartment, ensuring it is oriented correctly and sits securely. If it has adhesive, press it down gently.
- Plug the new battery's connector into the corresponding socket on the circuit board. Ensure it's fully seated and the connection is firm.
- Carefully swing the front cover of the panel upward. Ensure no wires are pinched.
- Press the cover firmly against the backplate until the top tabs latch securely and the cover is flush on all sides.
- Carefully snap the front faceplate/bezel back into place, ensuring all clips engage.
- Plug the panel's AC power transformer back into the electrical outlet.
- The panel should begin to power up. Allow several minutes for the panel to fully boot up.
Note: The new battery can take up to 24 hours to fully charge.
If you need further assistance, text us at 469.513.8685 or chat with us 24/7 for an immediate response.